Painting is one of the most accessible home improvement projects — it requires relatively little specialized equipment, offers one of the highest visual returns for the cost, and is genuinely achievable for most DIY skill levels. Yet the difference between an amateur-looking paint job and a professional-looking one almost always comes down to preparation, not the painting itself. This guide covers everything from choosing the right paint to the techniques that separate a mediocre result from a great one. It’s part of our broader Home Improvement Guide, where we cover planning principles that apply across every project.
Understanding Paint Types and Finishes
Paint finish (sheen) significantly affects both appearance and durability. Flat or matte finishes hide surface imperfections well and are popular for ceilings and low-traffic walls, but they’re harder to clean and less resistant to marks. Eggshell offers a subtle sheen with better washability, making it a popular all-purpose choice for living rooms and bedrooms. Satin provides a noticeably smoother, more washable finish, well-suited to high-traffic areas like hallways and kids’ rooms. Semi-gloss and gloss finishes offer maximum durability and washability, making them the standard choice for trim, doors, and bathrooms or kitchens where moisture and cleaning are frequent concerns.
Paint type matters for both application and durability. Latex (water-based) paint is the standard choice for most interior walls, offering easy cleanup, low odor, and good durability. Oil-based paint offers a harder, more durable finish, historically preferred for trim and high-wear surfaces, though many painters now use durable latex or hybrid formulas for trim due to oil-based paint’s stronger odor, longer drying time, and more complicated cleanup.
Primer is worth using whenever you’re painting over a significantly different color, painting new drywall or bare wood, covering stains, or painting a glossy surface that needs better paint adhesion. Skipping primer when it’s needed is one of the most common reasons a paint job requires more coats than expected or fails to properly adhere over time.
Essential Painting Tools and Supplies
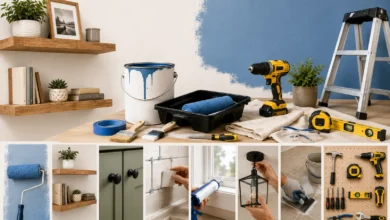
A basic painting toolkit includes: painter’s tape for clean edges, drop cloths to protect flooring and furniture, a paint tray and liner, quality brushes (an angled sash brush for cutting in edges, plus a wider brush for larger detail areas), rollers with the appropriate nap length for your surface texture, an extension pole for ceilings and tall walls, a five-in-one tool for scraping and prep work, sandpaper for smoothing surfaces, and a putty knife for filling small holes and cracks.
Investing in quality brushes and rollers genuinely makes a visible difference in the finished result — cheap brushes tend to shed bristles and apply paint unevenly, while quality tools hold more paint, apply more smoothly, and are easier to clean and reuse across multiple projects.
Prep Work: The Step Most People Skip
Proper prep work is what separates a professional-looking paint job from an amateur one, and it typically takes longer than the actual painting. Start by clearing and covering the room — move furniture to the center and cover it, or remove it entirely, and lay drop cloths over flooring.
Next, clean the walls, since dust, grease, and grime prevent paint from adhering properly, especially in kitchens and high-touch areas like light switches and door frames. Fill any holes, cracks, or dents with spackle or wood filler, then sand smooth once dry. Sand any glossy surfaces lightly to help new paint adhere, and wipe away sanding dust before painting begins.
Apply painter’s tape carefully along trim, ceiling lines, and any areas you want to protect, pressing it down firmly to prevent paint from bleeding underneath. Finally, if you’re painting over a significantly different color or a stain, apply primer and let it fully dry before starting your topcoat.
Also Read: Kitchen Remodeling Guide: Everything You Need to Know
Step-by-Step: How to Paint a Room
| Step | What to Do |
|---|---|
| 1. Prep the room | Clear furniture, lay drop cloths, remove outlet covers |
| 2. Clean and repair walls | Wash surfaces, fill holes, sand smooth |
| 3. Tape edges | Apply painter’s tape along trim, ceiling, and corners |
| 4. Prime if needed | Apply primer over stains, bare drywall, or major color changes |
| 5. Cut in edges | Use an angled brush to paint edges and corners before rolling |
| 6. Roll the main surfaces | Work in sections using a “W” pattern for even coverage |
| 7. Apply a second coat | Most paints need two coats for full, even color coverage |
| 8. Remove tape while paint is slightly wet | Pull tape at an angle before paint fully cures to prevent peeling |
| 9. Clean up and reassemble | Clean tools, replace outlet covers, move furniture back |
Exterior Painting: What’s Different
Exterior painting involves additional considerations beyond interior projects. Weather timing matters significantly — most exterior paints require a specific temperature range and low humidity to cure properly, making spring through early fall the ideal window in most climates. Painting in direct, intense sun can cause paint to dry too quickly, leading to visible lap marks, so many professional painters follow the shade around a house throughout the day rather than painting whichever side faces direct sun.
Surface prep is even more critical outdoors, since exterior surfaces endure far more wear from weather, UV exposure, and moisture. This typically involves power washing to remove dirt and loose paint, scraping and sanding any peeling areas, and repairing caulking around windows, doors, and trim before painting begins. Exterior paint itself is formulated differently from interior paint, with additives for UV resistance and flexibility to handle temperature fluctuations, so always confirm you’re using a paint specifically labeled for exterior use.
How Much Paint Do You Need?
Most paint calculations start with your wall square footage: measure the height and width of each wall, multiply to get square footage, then subtract roughly 20 square feet per standard door and 15 square feet per standard window. One gallon of paint typically covers 350–400 square feet with one coat, though texture and paint quality affect this. Since most rooms need two coats for full, even coverage, plan accordingly, and always round up slightly rather than risk running short mid-project and dealing with potential slight color variation between paint batches.
Common Painting Mistakes to Avoid
Skipping proper prep work. Painting over dirty, glossy, or damaged surfaces without cleaning, sanding, or repairing first leads to visible imperfections and paint that doesn’t adhere well long-term.
Using low-quality tools. Cheap brushes and rollers apply paint unevenly and shed bristles into your finish. Quality tools are a worthwhile investment even for occasional DIY painters.
Overloading the brush or roller. Too much paint leads to drips, uneven texture, and longer drying times. Load tools moderately and apply in thin, even coats, adding a second coat rather than trying to achieve full coverage in one heavy application.
Removing tape at the wrong time. Removing painter’s tape after the paint has fully dried can pull off dried paint along with it, creating a jagged edge. Removing tape while paint is still slightly wet, at a 45-degree angle, gives the cleanest line.
Ignoring ventilation. Even low-odor paints benefit from good airflow during application and drying, both for comfort and to help the paint cure properly.
Painting in poor conditions. Extreme temperatures, high humidity, or direct sun (for exterior work) can all affect how paint dries and adheres, leading to a less durable, less even finish.
Also Read: DIY Home Improvement Projects for Beginners
Frequently Asked Questions
How many coats of paint do I actually need?
Most rooms need two coats for full, even color coverage, especially when changing to a significantly different or lighter color. A single coat often shows uneven color, roller marks, or the previous color showing through.
What paint finish should I use for a kitchen or bathroom?
Semi-gloss or satin finishes are typically recommended for kitchens and bathrooms due to their moisture resistance and washability, compared to flat or matte finishes which are harder to clean and less durable in high-moisture areas.
When should I use primer?
Primer is worth using when painting over a significantly different color, bare drywall or wood, stains, or glossy surfaces that need better paint adhesion. Skipping primer in these situations often means needing more topcoat coats than expected.
What’s the best time of year to paint the exterior of a house?
Spring through early fall is generally ideal in most climates, when temperatures and humidity fall within the range most exterior paints need to cure properly. Extreme heat, cold, or humidity can all negatively affect the finished result.
How much paint do I need for an average room?
A typical 10×12 foot room with standard 8-foot ceilings usually needs about one gallon for two coats, though this varies based on the number of doors, windows, and the paint’s specific coverage rating. Always check the coverage information on your specific paint can.
Also Read: Bathroom Renovation Guide: Planning, Costs, and Design Tips