
The Complete Home Improvement Guide: Planning, Budgeting, and Renovating Your Home in 2026

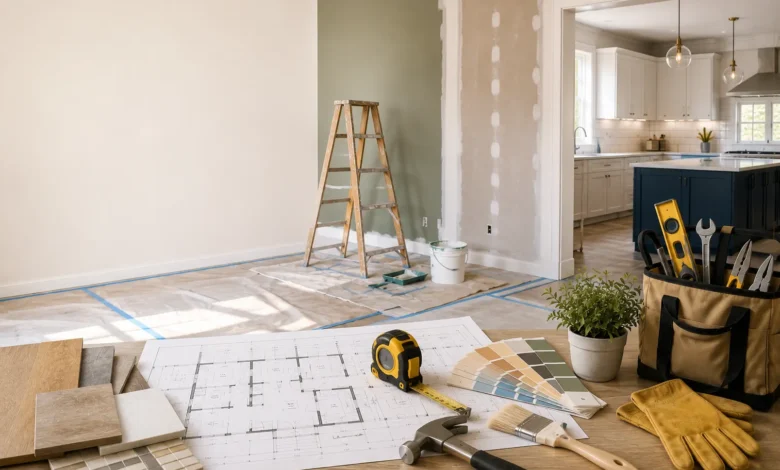
Home improvement can feel overwhelming the moment you decide to start. Should you tackle it yourself or hire a contractor? How much should a kitchen remodel actually cost? Which projects add real value, and which ones just drain your savings? These questions stop a lot of homeowners before they even pick up a paintbrush.
This guide exists to change that. Whether you’re planning a single weekend project or mapping out a multi-year renovation plan for your entire house, the principles here apply. We’ll walk through how to plan realistically, budget accurately, decide between DIY and professional help, and prioritize projects that actually improve your home’s function and value.
This is the foundation for everything in our Home Improvement category. Once you’ve read through it, dive into our room-specific guides on kitchens, bathrooms, painting, and more — each one linked throughout this article — for detailed, actionable steps.
Why Home Improvement Projects Fail Before They Start
Most home improvement projects don’t fail because of bad execution — they fail because of poor planning at the very beginning. Homeowners underestimate costs, skip permits that later cause problems, or start demolition before fully understanding what’s behind a wall. Understanding the common failure points in advance is the single best way to avoid them.
The most frequent mistake is starting without a full budget, including a contingency fund. Nearly every renovation uncovers something unexpected — outdated wiring, water damage, structural issues — once walls or flooring come up. Experienced contractors and renovation planners consistently recommend building in an additional 15–20% on top of your projected budget specifically for these surprises. Skipping this step is the single biggest reason renovations stall halfway through, when the money runs out before the work does.
The second most common failure point is scope creep — starting with a modest plan and gradually expanding it as new ideas come up mid-project. A simple bathroom refresh becomes a full gut renovation once you see the tile options in person. This isn’t inherently bad, but it needs to be a conscious decision with a revised budget, not something that happens by accident three weeks into the project.
The third failure point is choosing DIY for projects that require licensed professionals, either for legal reasons (electrical, plumbing, gas lines) or because mistakes are costly to fix later (structural changes, roofing). We’ll cover exactly where that line sits later in this guide.
Planning Your Home Improvement Project: A Step-by-Step Framework
Before any tools come out, walk through this planning sequence. It applies whether your project is a $200 weekend refresh or a $50,000 renovation.
Step 1: Define the problem you’re actually solving. Are you improving function (more storage, better flow), aesthetics (updated finishes, current style), or value (preparing to sell)? Different goals lead to very different project priorities, and being clear about which one you’re solving for keeps you from overspending on things that don’t matter for your actual goal.
Step 2: Research realistic costs before falling in love with ideas. Pinterest and home renovation shows often present finished projects without showing true costs. Before committing emotionally to a design direction, get a rough sense of what similar projects cost in your area, since regional labor and material costs vary significantly.
Step 3: Set your budget, then add a contingency fund. Once you have a realistic cost estimate, add 15–20% on top for unexpected issues. If that total exceeds what you’re comfortable spending, this is the moment to scale back the project — not three weeks in when you’ve already opened up the walls.
Step 4: Decide what you’ll DIY and what needs a professional. Be honest about your skill level, available time, and the legal or safety implications of the specific task. We cover this decision in detail in the next section.
Step 5: Get multiple quotes if hiring professionals. For any project over a few thousand dollars, get at least three quotes from licensed, insured contractors. Significant price variation between quotes is normal and worth understanding — the cheapest bid isn’t always the best value, and it’s worth asking what’s included and excluded in each quote.
Step 6: Check permit requirements before starting. Many homeowners skip this step, assuming permits are unnecessary bureaucracy, but unpermitted work can cause serious problems later — from failed home inspections during a sale to insurance claims being denied. We’ll cover exactly when permits are typically required later in this guide.
Step 7: Create a realistic timeline, then add buffer time. Just like budgets, timelines almost always run longer than initially planned, especially once unexpected issues surface. Building in buffer time reduces stress and prevents rushed decisions later in the project.
DIY vs. Hiring a Professional: How to Decide
This is one of the most consequential decisions in any home improvement project, and getting it wrong can be expensive in both directions — paying a professional for something you could have done yourself, or attempting something that requires expertise you don’t have.
Good candidates for DIY typically include: painting (interior and most exterior surfaces), installing shelving and simple storage solutions, replacing cabinet hardware, basic landscaping, installing peel-and-stick or click-lock flooring, minor drywall repair, and assembling or installing pre-made furniture and fixtures. These projects generally have a forgiving margin for error, don’t require specialized licensing, and mistakes are relatively inexpensive to fix.
Projects that usually require a licensed professional include: any electrical work beyond swapping a light fixture or outlet cover (in most areas, electrical work requires a licensed electrician both for safety and legal code compliance), plumbing work involving new lines or gas connections, structural changes like removing load-bearing walls, roofing repairs and replacement, HVAC installation or major repair, and anything involving asbestos or lead paint in older homes, which requires specific safety protocols.
The gray area includes projects like tiling, cabinet installation, and some flooring types. These are technically possible to DIY with research and patience, but the difficulty and consequences of mistakes are higher than beginner-level projects. Consider your own experience level, the visibility of the finished result (a bathroom tile job mistake is very visible daily), and whether a failed attempt would cost more to fix than hiring a professional from the start.
A practical rule of thumb: if a mistake could compromise your home’s safety, structural integrity, or require licensed correction, hire a professional. If a mistake mainly costs you time and a bit of wasted material, DIY is often worth the attempt and the money saved.
Understanding Home Improvement Costs
Home improvement costs vary enormously by region, project scope, and material choices, but understanding rough cost categories helps you plan realistically before getting specific quotes.
| Project Type | Typical Cost Range | Key Cost Drivers |
|---|---|---|
| Interior painting (one room) | $300–$1,000 | Room size, paint quality, prep work needed |
| Kitchen remodel (minor to major) | $15,000–$60,000+ | Cabinet quality, countertop material, appliance upgrades |
| Bathroom remodel | $8,000–$25,000+ | Fixture quality, tile work, layout changes |
| Flooring installation | $3–$15+ per sq ft | Material type, subfloor condition, room size |
| Roof replacement | $8,000–$25,000+ | Roof size, material, pitch and complexity |
| Window replacement | $400–$1,200 per window | Window type, frame material, number of windows |
These figures are general starting points, not quotes — always get local, current estimates for your specific project, since material costs and regional labor rates shift over time.
Which Home Improvements Add the Most Value?
If part of your motivation is increasing your home’s resale value, not all projects deliver equally. Kitchen and bathroom updates consistently rank among the highest-return renovations, since these are the rooms buyers scrutinize most closely. However, full luxury renovations in these rooms often don’t return their full cost at resale — a moderate, well-executed update tends to offer better value than an ultra-high-end one, unless your home is already in a luxury market segment.
Curb appeal projects — a new front door, updated landscaping, exterior paint, and garage door replacement — consistently rank as some of the highest return-on-investment projects, often because they’re relatively affordable compared to interior renovations while significantly impacting a buyer’s first impression.
Energy efficiency improvements, like new insulation, energy-efficient windows, and updated HVAC systems, are increasingly valued by buyers due to ongoing utility cost savings, and many regions offer rebates or tax incentives that improve their overall return.
Projects that tend to offer the lowest return relative to cost include highly personalized additions (like a swimming pool in a region where they’re uncommon), over-customized rooms (a home office converted from a bedroom, reducing bedroom count), and very high-end finishes that exceed what comparable homes in your neighborhood typically have.
Also Read: How to Budget for a Home Improvement Project for a full breakdown of financing options and cost-saving strategies.
Permits: When You Need Them and Why They Matter
Permit requirements vary by location, but as a general guideline, most jurisdictions require permits for: structural changes (removing or altering walls), electrical work beyond basic fixture swaps, plumbing changes involving new pipe runs, adding square footage (room additions, decks over a certain size), roofing replacement in many areas, and HVAC system replacement or major modification.
Projects that typically don’t require permits include: painting, most flooring replacement (unless it involves subfloor structural changes), cabinet and countertop replacement without layout changes, and minor landscaping.
Skipping required permits can cause serious problems down the line. Unpermitted work often needs to be disclosed when selling a home, and buyers or their inspectors may require it to be brought up to code retroactively — a far more expensive process than getting permits from the start. Insurance claims related to unpermitted work are also sometimes denied, leaving homeowners fully responsible for damage costs. When in doubt, a quick call to your local building department clarifies exactly what’s required for your specific project.
Room-by-Room: Where to Start
Not sure which room to tackle first? Here’s how to prioritize based on common homeowner goals.
If you’re preparing to sell: Focus on the kitchen, primary bathroom, and curb appeal first, since these areas most influence buyer perception and appraisal value.
If you’re improving daily livability: Focus on the rooms you use most — often the kitchen and primary bathroom again, but also consider storage and organization projects throughout the home, which tend to be lower-cost but high-impact for daily life.
If you’re on a tight budget: Start with painting, which offers one of the highest visual impacts for the lowest cost, and small hardware or fixture updates (cabinet pulls, light fixtures, faucets) that refresh a space without a full renovation.
If you just moved in: Prioritize anything related to safety and function first — checking the roof, HVAC system, plumbing, and electrical for issues — before moving on to cosmetic updates. It’s far better to discover and address these issues early than after you’ve already invested in aesthetics.
Also Read: Kitchen Remodeling Guide: Everything You Need to Know and Bathroom Renovation Guide for detailed room-specific planning.
Building a Home Improvement Toolkit
Even homeowners who plan to hire out most major projects benefit from a basic toolkit for everyday maintenance and small DIY tasks. A solid starter toolkit includes: a good hammer, a set of screwdrivers (both flathead and Phillips), an adjustable wrench, a tape measure, a level, a stud finder, a utility knife, pliers, a cordless drill with various bits, and a basic set of hand saws. Beyond tools, keep a stock of essentials on hand — wood filler, caulk, painter’s tape, sandpaper, and a range of screws and anchors — since small repairs come up more often than most homeowners expect.
As your DIY confidence grows, you can expand into more specialized tools like a circular saw, a jigsaw, or a tile cutter, but the basic toolkit above covers the vast majority of everyday home maintenance and small improvement projects.
Seasonal Home Improvement Planning
Timing matters for many home improvement projects, both for cost and practicality. Exterior projects like roofing, siding, painting, and landscaping are best scheduled for spring through early fall in most climates, when weather is more predictable and contractors have more availability, though this also means pricing can be higher during peak season. Interior projects, like kitchen and bathroom remodels, are often more affordably scheduled in late fall and winter, when contractor demand typically drops and some offer off-season pricing.
HVAC system servicing and replacement is best done proactively before extreme weather seasons — servicing your cooling system in spring before summer heat, and your heating system in fall before winter cold — rather than waiting for a breakdown during peak demand, when repairs and replacements often cost more due to urgency and contractor availability.
Common Home Improvement Mistakes to Avoid
Underestimating the budget. Nearly every renovation costs more than the initial estimate once unexpected issues surface. Building in a 15–20% contingency from the start prevents projects from stalling due to funding shortfalls.
Skipping the research phase. Jumping straight into demolition without understanding what’s behind walls, under flooring, or above ceilings leads to costly surprises and project delays.
Choosing the cheapest contractor bid automatically. The lowest quote sometimes reflects lower-quality materials, less experience, or corners being cut. Compare what’s actually included in each bid, not just the bottom-line number.
Ignoring permit requirements. Unpermitted work can complicate future home sales and insurance claims. It’s worth the extra time and cost to do projects properly from the start.
Over-customizing for resale value. If you plan to sell within a few years, avoid highly personalized renovations that may not appeal to the broader buyer pool in your area.
Neglecting function for aesthetics. A beautiful kitchen with poor storage or workflow will frustrate daily use. Prioritize how a space actually functions before finalizing purely visual decisions.
Financing Your Home Improvement Project
Not every renovation needs to be paid for in cash upfront, and understanding your financing options helps you plan realistically. A home equity loan or home equity line of credit (HELOC) allows homeowners to borrow against the equity built up in their property, typically at lower interest rates than personal loans or credit cards, making them a common choice for larger renovations. Cash-out refinancing replaces your existing mortgage with a new, larger one, allowing you to pocket the difference for renovation costs, though this resets your mortgage terms and is worth comparing carefully against current rates.
Personal loans and renovation-specific loans offer another path, generally with higher interest rates than home equity options but without using your home as collateral, and often faster approval times for smaller projects. Some homeowners also use 0% introductory APR credit cards for smaller projects, though this only makes financial sense if the balance can realistically be paid off before the promotional rate expires.
Whatever financing route you choose, it’s worth calculating the true cost of borrowing — including interest over the loan’s life — against the value or livability improvement the project provides, rather than focusing solely on the monthly payment amount.
How to Vet and Hire a Contractor
Choosing the right contractor is often just as important as the renovation plan itself. Start by confirming licensing and insurance — reputable contractors should be able to provide proof of both without hesitation, and many state or local licensing boards allow you to verify this information independently online.
Ask for references from recent projects similar in scope to yours, and actually follow up with those references rather than simply collecting names. Questions worth asking references include whether the project finished on time and on budget, how communication was handled throughout, and whether they would hire the same contractor again.
Get a detailed written contract before any work begins, covering the full scope of work, materials to be used, payment schedule, and estimated timeline. Avoid contractors who ask for full payment upfront — a typical structure involves a deposit (often around 10–30%), progress payments tied to project milestones, and a final payment upon completion and your satisfaction with the finished work.
Be cautious of red flags: pressure to sign immediately, requests for cash-only payment, prices significantly below other quotes without a clear explanation, or reluctance to provide licensing and insurance documentation. These signs don’t always indicate a scam, but they warrant extra scrutiny before moving forward.
Sustainable and Energy-Efficient Home Improvements
More homeowners are factoring long-term energy costs and environmental impact into their renovation decisions, and several improvements offer both. Upgrading insulation, particularly in attics and around windows and doors, is often one of the most cost-effective ways to reduce energy bills, since heat loss and gain through poorly insulated areas significantly affects heating and cooling costs. Energy-efficient windows with better sealing and glazing reduce drafts and can noticeably lower utility bills, though they represent a larger upfront investment than insulation alone.
Smart thermostats offer a relatively low-cost way to optimize heating and cooling schedules automatically, often paying for themselves within a year or two through reduced energy waste. LED lighting throughout the home reduces electricity use significantly compared to older incandescent or even older CFL bulbs, and modern LED options now match or exceed the light quality homeowners expect.
For homeowners considering larger investments, solar panel installation, high-efficiency HVAC systems, and tankless water heaters all reduce ongoing utility costs, though the upfront investment and payback period vary significantly based on your region, local utility rates, and available incentives or rebates. Many regions offer tax credits or rebate programs for energy-efficient upgrades, which can meaningfully offset the initial cost — it’s worth researching what’s available in your area before finalizing a renovation budget.
Quick, High-Impact Projects for Any Budget
Not every home improvement needs to be a major renovation. If you’re looking for meaningful impact on a modest budget, consider: repainting a single accent wall or an entire room, which offers one of the highest visual returns for the lowest cost; updating cabinet hardware and light fixtures, which can modernize a kitchen or bathroom without touching the layout; deep cleaning and re-grouting existing tile, which often makes a bathroom look dramatically fresher without any demolition; adding open shelving or improved closet organization systems, which increases functional storage; and refreshing landscaping and exterior lighting, which meaningfully boosts curb appeal for a relatively small investment.
These smaller projects are also excellent starting points for homeowners who are new to DIY, building confidence and skills before tackling larger renovations.
Insurance Considerations During Renovation
Home improvement projects can affect your homeowner’s insurance in ways that are easy to overlook. Before starting a major renovation, it’s worth calling your insurance provider to understand how the project might affect your coverage. Some renovations — like finishing a basement, adding square footage, or upgrading systems — can increase your home’s replacement value, meaning your existing coverage limits might no longer be sufficient once the project is complete.
During construction, ask whether your policy covers the property while work is underway, particularly for larger projects involving open walls, temporary structures, or extended periods where the home is more vulnerable to weather damage or theft. Many contractors carry their own liability insurance to cover accidents or damage during the project, which is another reason verifying contractor insurance matters — without it, you could be liable for injuries or damage that occur on your property during the renovation.
After completing a major project, update your policy and consider having your home reappraised if the renovation significantly increased its value, ensuring you’re neither underinsured nor overpaying for coverage that doesn’t reflect your home’s actual improvements.
Frequently Asked Questions
How much should I budget for home improvement contingency costs?
Most experienced renovators recommend setting aside an additional 15–20% beyond your initial project budget to cover unexpected issues that commonly surface once walls, flooring, or systems are opened up.
Which home improvement projects add the most resale value?
Kitchen and bathroom updates, along with curb appeal projects like exterior paint, landscaping, and a new front door, consistently rank among the highest-return renovations, particularly when done at a moderate rather than ultra-luxury level.
Do I need a permit for a DIY home improvement project?
It depends on the project. Structural changes, electrical work, plumbing changes, and additions typically require permits, while painting, most flooring, and cosmetic updates usually don’t. Check with your local building department for project-specific requirements.
How do I know if I should DIY a project or hire a professional?
If a mistake could compromise safety, structural integrity, or require licensed correction, hire a professional. If a mistake would mainly cost time and material, DIY is often a reasonable and money-saving choice.
What’s the biggest reason home improvement projects go over budget?
Unexpected issues discovered during the project — outdated wiring, water damage, or structural problems — are the most common cause. This is exactly why a contingency fund of 15–20% is so strongly recommended.
What home improvement projects should I prioritize first?
Safety and function-related issues — roofing, HVAC, plumbing, and electrical — should generally take priority over cosmetic updates, especially in a newly purchased home where these systems haven’t been recently inspected.
How many contractor quotes should I get before hiring?
Most experts recommend getting at least three quotes for any project over a few thousand dollars. This gives you a realistic sense of the typical cost range and helps you spot bids that are unusually high or suspiciously low.
Will renovating affect my homeowner’s insurance?
It can. Major renovations that increase your home’s value or involve extended construction periods may require updated coverage. It’s worth contacting your insurance provider before starting a large project to confirm you’re properly covered throughout and after the work.
Also Read: Complete Home Decor Guide: Styles, Tips, and Budget-Friendly Ideas for Every Room