Why Most Rooms Look Flat (And It’s Not the Furniture)
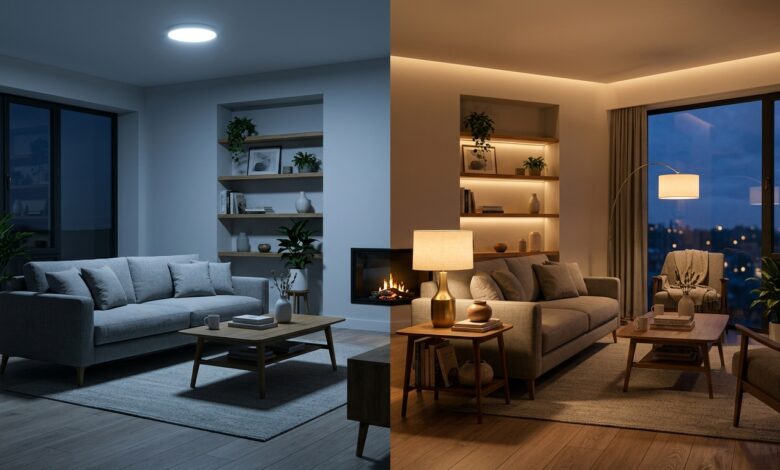
If you’ve ever walked into a beautifully furnished room that still felt cold, sterile, or somehow “off,” the problem almost certainly wasn’t the sofa or the paint color. It was the lighting.
Here’s the pattern in nearly every under-lit home: one ceiling fixture, one switch, one brightness level, all night long. That single overhead light — what designers call ambient light — is doing 100% of the work in a room that actually needs three different kinds of light working together.
Professional interior designers never rely on one light source. They build rooms in layers, the same way a stylist layers clothing — a base layer for warmth, a functional layer for movement, and an outer layer for personality. Lighting works exactly the same way, and once you see it, you can’t unsee it in badly-lit rooms.
This guide breaks down the exact 3-step method designers use to layer lighting in any room, plus the specific lumens, color temperatures, and fixture types that make it work — without an electrician, in most cases, and often in a single afternoon.
The 3 Lighting Layers Every Room Needs
Before you buy a single bulb, it helps to understand what each layer actually does. These three types of lighting aren’t interchangeable — each one solves a different problem.
| Layer | What It Does | Common Fixtures | Typical Color Temp |
|---|---|---|---|
| Ambient | Overall room illumination — your base layer, not your only layer | Ceiling fixture, recessed lights, chandelier | 2700K–3000K |
| Task | Directed, functional light for a specific activity | Desk lamp, under-cabinet lights, reading lamp | 3000K–4000K |
| Accent | Decorative, mood-setting light that adds depth | LED strips, picture lights, small lamps | 2700K–3000K |
Ambient Light: The Base Layer
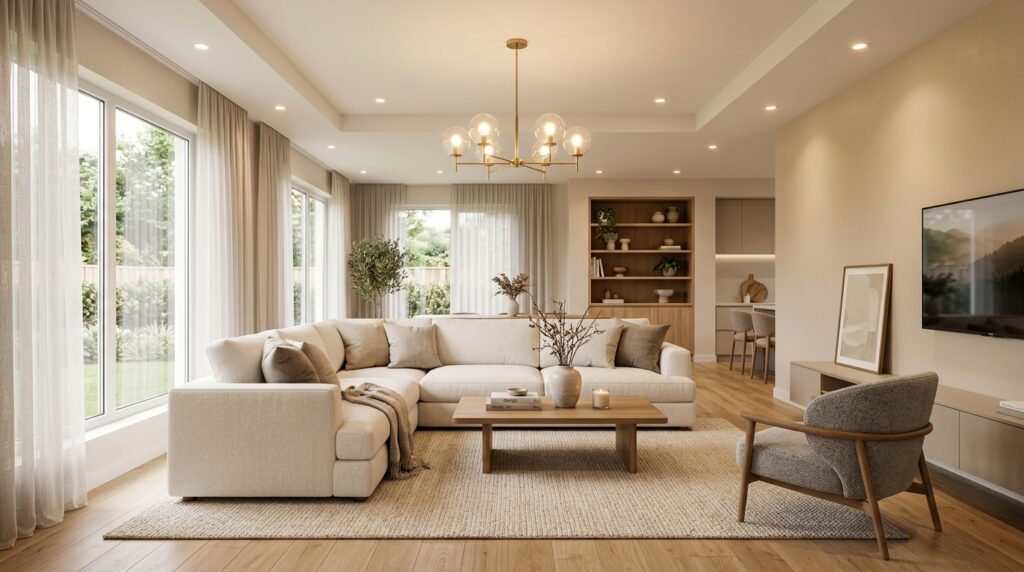
Ambient light is the general light source in a room — a ceiling fixture, recessed cans, or a chandelier. It’s what lets you walk through a room safely without bumping into furniture. The mistake most homeowners make is treating ambient light as the only layer, instead of the foundation beneath the other two.
Task Light: The Functional Layer
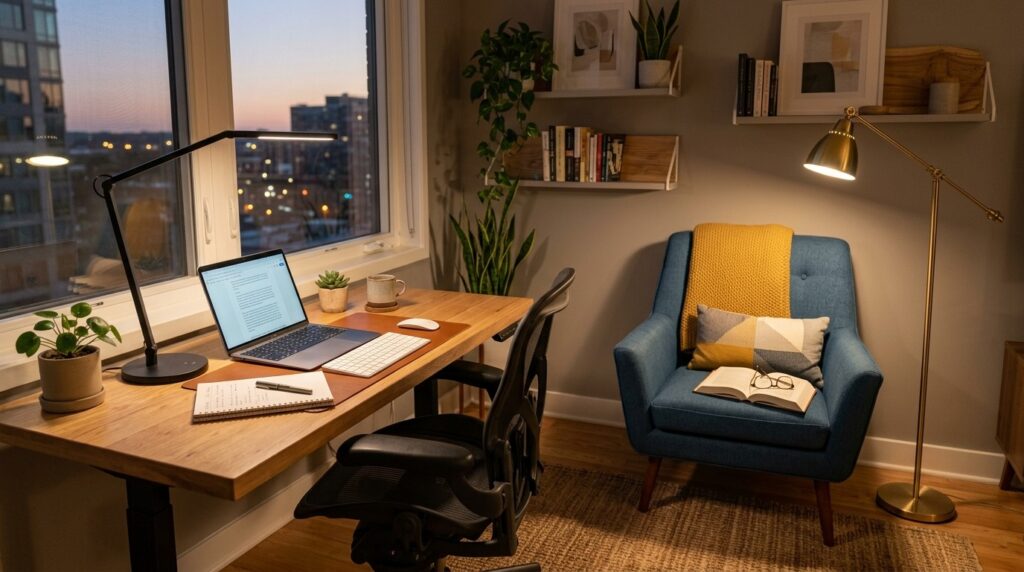
Task lighting is directed and purposeful. It’s a desk lamp angled onto your keyboard, under-cabinet LEDs illuminating a cutting board, or a reading lamp positioned beside an armchair. Its job isn’t to light the whole room — it’s to eliminate shadows exactly where you’re doing something.
Accent Light: The Mood Layer
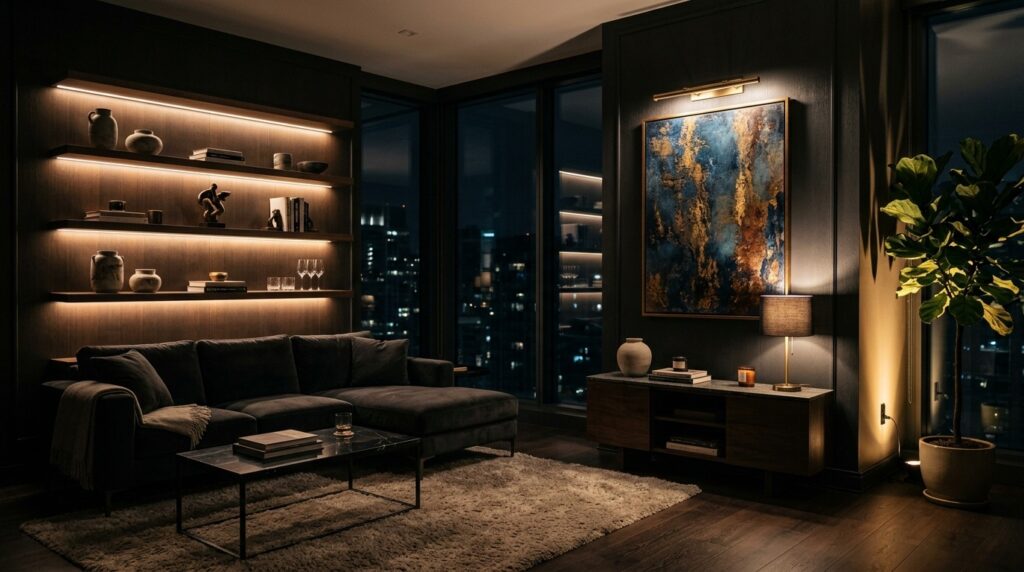
Accent lighting is where a room goes from “functional” to “designed.” Think LED strips tucked under a floating shelf, a small picture light above artwork, or a lamp glowing softly on a bookcase. It’s the layer most homes skip entirely — and it’s the one that makes a room feel warm, dimensional, and intentional after the sun goes down.
The 3-Step Layering Method, Explained
Layering light isn’t about buying more lamps at random. It’s a sequence. Designers follow the same three-step order every time, because each step depends on the one before it.
- Step 1 — Establish ambient light. Get the base level of illumination right first. Everything else builds on top of this.
- Step 2 — Add task lighting. Identify where people actually do things in the room, and light those spots directly.
- Step 3 — Layer in accent lighting. Add the decorative touches that create depth, warmth, and visual interest.
Skip a step, and the room stays unbalanced — either flat and shadowless (ambient only), harshly functional (ambient + task, no accent), or pretty but impractical (accent only, with nowhere to actually read a book). All three layers, working together, are what create a professionally designed feel.
Also Read: Budget Home Decor That Looks Expensive: The Complete Guide to a Luxurious Home on a Small Budget
Step 1: Establish Ambient Light (Your Base Layer)
Start by assessing what’s already providing general illumination — a ceiling fixture, recessed lighting, or even large windows during the day. Your goal is even, low-glare coverage across the whole room, not brightness for its own sake.
How to Get Ambient Light Right
- Check your lumens, not your watts. Watts measure energy use; lumens measure actual brightness. A standard living room needs roughly 1,500–3,000 total lumens of ambient light.
- Pick a warm color temperature. For living rooms and bedrooms, stay in the 2700K–3000K range — this is the warm, golden-white light that feels cozy rather than clinical.
- Put it on a dimmer. A dimmer switch or dimmable smart bulb turns one fixture into several moods, and it’s one of the single highest-value upgrades in any lighting plan.
- Don’t forget natural light. Window treatments that diffuse rather than block daylight extend your ambient layer for free during the day.
If your only ambient source is a single flush-mount ceiling light, that’s fine as a starting point — it just can’t be the only light in the room once you move to steps two and three.
Step 2: Add Task Lighting Where You Actually Need It
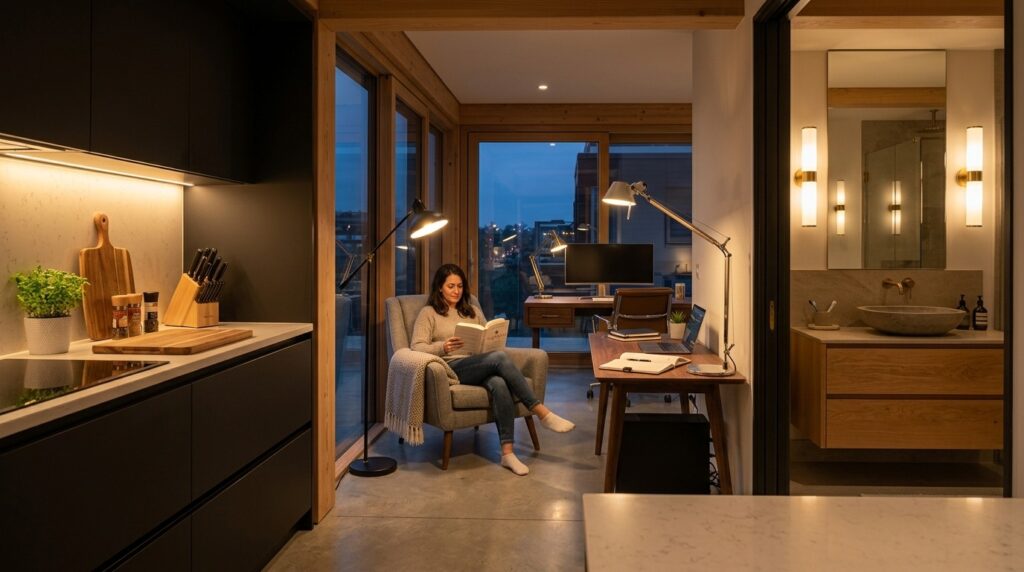
Task lighting only works if it’s placed where a real activity happens. Walk through your room and mentally mark every spot where someone reads, cooks, works, or grooms — that’s your task lighting map.
| Activity Zone | Recommended Task Fixture | Placement Tip |
|---|---|---|
| Reading nook / armchair | Adjustable floor or table lamp | Position beside and slightly behind the shoulder |
| Kitchen counters | Under-cabinet LED strip lighting | Mount at the front edge of upper cabinets |
| Home office desk | Articulating desk lamp, 3500K–4000K | Angle to avoid screen glare |
| Bathroom vanity | Side sconces at eye level | Avoid a single downlight directly overhead |
| Kitchen island | Pendant lights, 30–36 inches above counter | Space evenly if using multiple pendants |
A useful rule of thumb from professional lighting designers: stand where you’ll actually do the task — chopping, reading, applying makeup, typing — and light that surface first. Ambient and accent lighting exist to support that task light, not replace it.
Step 3: Layer In Accent Lighting for Depth and Mood
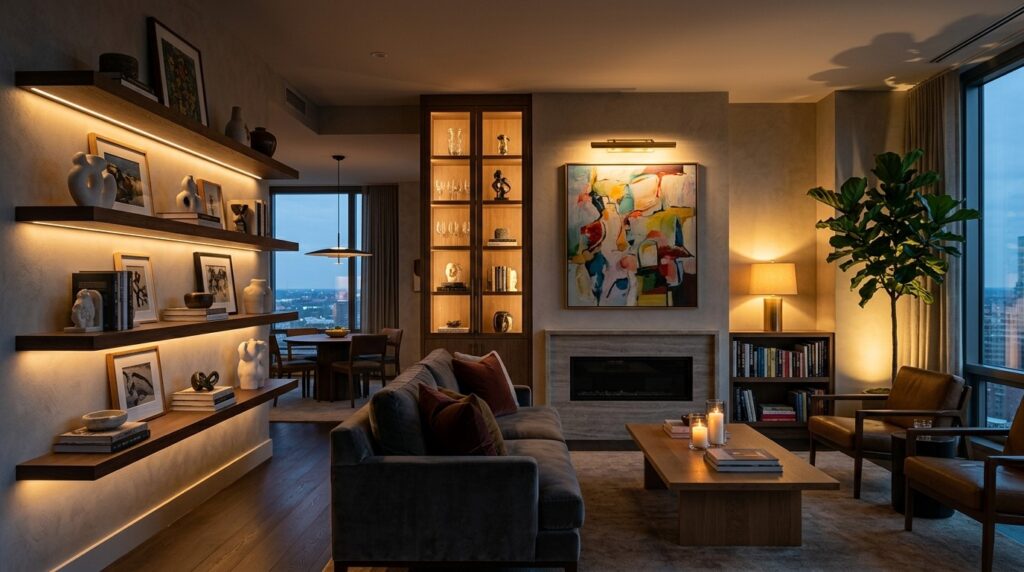
Accent lighting is the layer that separates a “decorated” room from a “designed” one. It’s subtle, but its absence is exactly why so many homes feel flat after dark.
Easy Accent Lighting Wins
- LED strip lights under a floating shelf, along a headboard, or inside a glass cabinet — battery or plug-in strips install in minutes with no wiring.
- A picture light mounted above framed art or a mirror adds an instant gallery-quality focal point.
- A small lamp on a bookcase or console table fills dark corners that ceiling light can’t reach.
- Uplighting behind a plant or sculpture casts dramatic shadows on the wall behind it.
As a brightness guideline, accent lighting should generally be brighter and more focused than the ambient light around it — a narrow beam, not a wide wash — so it actually draws the eye instead of blending in.
The Fastest Upgrade: Smart Bulbs at 2700K
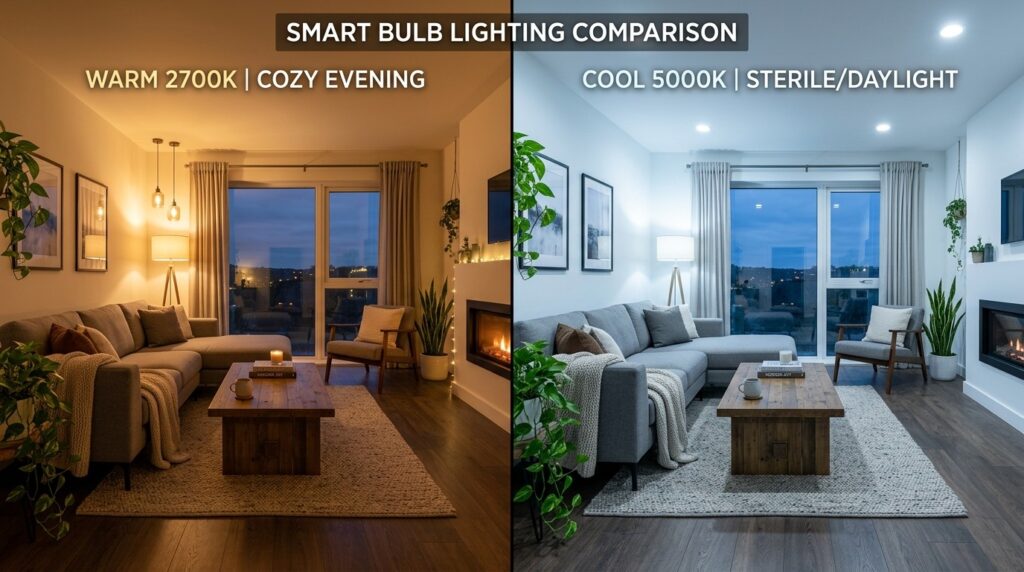
If you only do one thing after reading this guide, do this: put your lamps on smart bulbs set to warm white (2700K) in the evening.
Smart bulbs cost roughly $10–$15 each and screw into any existing lamp or fixture — no rewiring, no electrician, no tools beyond your hands. The visual difference between a cool white (5000K+) overhead light and a warm 2700K lamp is immediate and dramatic; one feels like an office, the other feels like a home.
Why This Works So Well
- Instant mood control. Most smart bulbs let you schedule warm tones automatically after sunset, so you never have to remember to switch it.
- Dual-purpose lighting. Tunable-white smart bulbs can shift from energizing daylight tones in the morning to warm, relaxed tones at night — one bulb, two functions.
- No renovation required. This is the single highest return-on-effort lighting upgrade available to renters and homeowners alike.
Quick tip: Keep color temperatures consistent within a single scene. Mixing 2700K lamps with a 5000K overhead in the same room at the same time reads as mismatched, not intentional.
Room-by-Room Lighting Specs (Lumens, Kelvin, Fixtures)
Use this table as a starting reference. Exact numbers will vary with room size and ceiling height, but these ranges reflect what most residential lighting designers recommend.
| Room | Ambient Target | Task Light | Color Temp | Accent Idea |
|---|---|---|---|---|
| Living Room | 1,500–3,000 lumens, dimmable | Reading lamp beside seating | 2700K–3000K | LED strip behind TV or shelving |
| Kitchen | ~30 fc general; 50–75 fc at counters | Under-cabinet strips, island pendants | 3000K–3500K | Toe-kick lighting or open-shelf strips |
| Bedroom | Low, soft ambient on a dimmer | Bedside lamps for reading | 2700K | Warm strip behind headboard |
| Home Office | Even, glare-free ambient | Desk lamp, neutral tone | 3500K–4000K | Small lamp or shelf lighting |
| Bathroom | Even ceiling light | Vertical sconces at mirror height | 3000K–3500K, high CRI | LED strip under vanity or mirror |
Designer insight: In kitchens especially, look for fixtures with a high CRI (Color Rendering Index) of 90 or above near food prep and vanity areas — it keeps produce, skin tones, and finishes looking true to color rather than washed out or greenish.
Budget Breakdown: What It Actually Costs
You don’t need a full rewiring project to layer light. Here’s roughly what each tier costs to implement in a single room.
| Budget Tier | What You Get | Approx. Cost |
|---|---|---|
| Starter ($30–$60) | 2–3 smart bulbs (2700K) in existing lamps + one LED strip | $30–$60 |
| Mid-range ($100–$250) | Starter tier + a new floor or table lamp + dimmer switch | $100–$250 |
| Full layering ($300–$800) | Ambient fixture upgrade + task lighting + accent strips + smart controls | $300–$800 |
| Designer-level ($1,000+) | Recessed lighting, pendant fixtures, whole-room smart control system | $1,000+ |
The good news: the Starter tier alone — smart bulbs plus one LED strip — delivers a disproportionately large visual improvement for the money. Most of the “wow factor” comes from color temperature and layering, not from expensive fixtures.
7 Common Layered Lighting Mistakes
- Relying on ambient light alone. One ceiling fixture and nothing else is the single most common cause of a flat-feeling room.
- Mixing color temperatures within one scene. A 2700K lamp next to a 5000K overhead light looks like a mistake, not a design choice.
- A single downlight over a bathroom mirror. It casts shadows under the eyes and chin. Side sconces at eye level solve this.
- Naked LED strips with no diffuser. Undiffused strips create visible “dots” or scallops of light on cabinets and backsplashes. Choose strips with a diffuser channel.
- Skipping dimmers entirely. Without dimming, you’re stuck with one brightness level regardless of time of day or activity.
- Oversized, tight-beam pendants over tables. A narrow beam creates a harsh hotspot and heavy shadows. A wider shade or diffuser spreads the light more evenly.
- No accent layer at all. Without it, a room can be perfectly functional and still feel sterile after dark.
Layered Lighting Checklist
Walk through this checklist room by room before calling your lighting plan finished:
- Ambient light source identified and set to 2700K–3000K (living spaces) or 3500K–4000K (work spaces)
- At least one task light placed at every activity zone (reading, cooking, working, grooming)
- At least one accent light source added (LED strip, picture light, or small lamp)
- All lamps switched to warm-white smart bulbs or equivalent LEDs
- Dimmer or smart control added to at least the ambient layer
- No mismatched color temperatures within the same evening scene
- Dark corners checked and filled with a small accent or task lamp
Frequently Asked Questions
What is the 3-step lighting method?
It’s a sequence used by interior designers to layer light in any room: first establish ambient (overall) light, then add task lighting at specific activity zones, then finish with accent lighting for depth and mood. Following the steps in this order prevents a room from feeling either flat or unbalanced.
What are the 3 types of lighting in a room?
Ambient (general illumination), task (directed, functional light for specific activities), and accent (decorative, mood-setting light). Most under-lit homes only have the ambient layer.
What color temperature should I use for home lighting?
Use 2700K–3000K (warm white) for living rooms and bedrooms, and 3000K–4000K (neutral white) for kitchens, bathrooms, and home offices where task visibility matters more than coziness.
How many lumens do I need for a living room?
Most living rooms need roughly 1,500–3,000 total lumens of ambient light, adjusted for room size. Layer additional task and accent lighting on top of that base.
Is layered lighting expensive to set up?
Not necessarily. A starter setup — two or three warm-white smart bulbs plus one LED strip — typically costs $30–$60 and delivers a noticeable improvement without any rewiring or electrician visit.
Do I need an electrician to layer my lighting?
Usually not. Smart bulbs, plug-in lamps, and battery or plug-in LED strips require no wiring at all. An electrician is only necessary for new hardwired fixtures, recessed lighting, or additional outlets.
What’s the fastest lighting upgrade I can make today?
Replace your lamp bulbs with warm white (2700K) smart bulbs. The contrast with typical cool white overhead lighting is immediate, and most bulbs install in under a minute with no tools.
Final Thoughts: Small Changes, Dramatic Results
A flat, uninviting room is rarely a furniture problem — it’s a lighting problem, and specifically a single-layer lighting problem. The fix isn’t a renovation; it’s a sequence: establish your ambient base, add task lighting exactly where you need it, and finish with accent lighting that gives the room depth after dark.
Start tonight with the fastest win available: swap your lamp bulbs for warm white (2700K) smart bulbs. Then, room by room, work through the checklist above. Within a weekend, you can transform every major room in your home from flat and functional to layered and lived-in — no electrician required.
Also Read: Complete Home Decor Guide: Styles, Tips, and Budget-Friendly Ideas for Every Room