
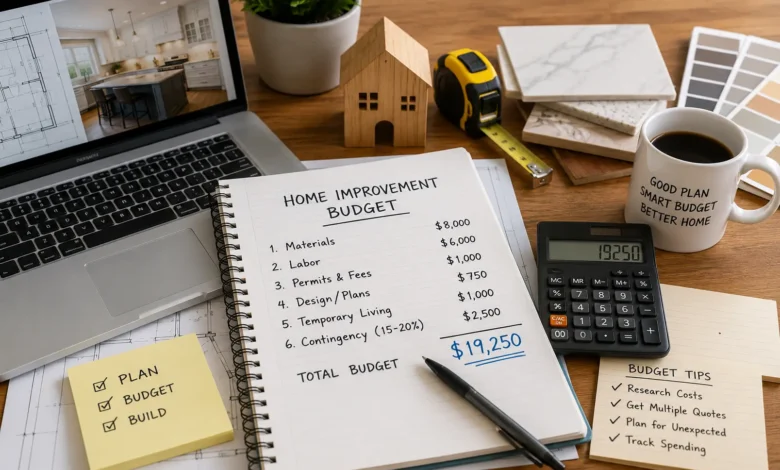
A realistic budget is the single most important factor separating a smooth home improvement project from a stressful one. Underestimating costs is the leading cause of stalled renovations, unfinished projects, and financial strain, and it happens to careful, well-intentioned homeowners far more often than most people expect. This guide walks through exactly how to build a home improvement budget you can trust, from initial estimation through tracking spending during the project, so you can move forward with confidence instead of guesswork. It’s part of our broader Home Improvement Guide, where we cover planning principles for projects of any size.
Why Home Improvement Budgets Go Wrong
Before diving into how to build a budget correctly, it helps to understand why so many renovation budgets fail in the first place. The most common cause is starting with an incomplete cost picture — homeowners often price out materials and labor for the visible, obvious parts of a project while overlooking permits, disposal fees, temporary living adjustments, and the near-certainty of at least one unexpected issue once work begins.
The second common cause is emotional decision-making mid-project. Once demolition starts and design choices become real rather than theoretical, it’s easy to upgrade a countertop, add a feature, or expand scope without formally revisiting the budget to account for the change. Individually, these decisions can feel small, but they compound quickly.
The third cause is simply not tracking spending as the project unfolds. Many homeowners set an initial budget and then don’t check back against it until the project is finished, at which point it’s too late to make adjustments that could have kept things on track. Understanding these failure points in advance is the best way to avoid repeating them.
Step 1: Research Realistic Costs Before Committing
Before setting any numbers in stone, research what similar projects actually cost in your specific area, since labor and material costs vary significantly by region, sometimes by tens of thousands of dollars for the same scope of work depending on local market conditions. Online cost calculators and contractor websites can offer rough starting estimates, but nothing replaces getting a few actual quotes from local professionals, even if you ultimately plan to DIY part of the project — this gives you a realistic benchmark for comparison and helps you spot if your expectations are significantly out of line with local pricing.
If you’re renovating an older home, factor in the increased likelihood of uncovering issues like outdated wiring, plumbing, or structural concerns once walls or flooring are opened up. Older homes generally warrant a larger contingency allocation than newer homes with more recently updated systems, since decades-old construction is far more likely to reveal surprises that weren’t visible during initial planning.
It’s also worth researching seasonal and regional pricing trends. Contractor demand — and therefore pricing — often rises during peak renovation seasons in your climate, and material costs can fluctuate based on broader supply chain conditions. Getting quotes at different times, if your timeline allows flexibility, can sometimes reveal meaningful cost differences.
Step 2: Break Down Your Budget by Category
Rather than working with a single lump budget number, break your total project cost into clear categories: materials, labor (if hiring professionals), permits and fees, temporary living adjustments, and your contingency fund. This breakdown makes it much easier to track spending accurately as the project progresses and to identify exactly where you might be able to cut costs if something starts to run over.
A typical budget breakdown for a mid-range renovation might allocate roughly 40–50% to materials and finishes, 30–40% to labor, 5–10% to permits and fees, and the remaining 15–20% held in reserve as your contingency fund. These percentages shift depending on project type — a DIY project obviously eliminates most labor costs and shifts a much larger share toward materials, while a highly custom project with intricate craftsmanship might skew more heavily toward labor.
Within the materials category, it also helps to sub-categorize by priority. Identify which materials matter most for durability or daily use (flooring, countertops, fixtures you’ll touch constantly) versus which are more purely cosmetic and could be scaled back if the budget gets tight later. Having this hierarchy established in advance makes it much easier to make quick, informed decisions if you need to trim costs partway through.
Step 3: Always Build in a Contingency Fund
This point is worth repeating because it’s consistently the most common reason renovations run into financial trouble: set aside 15–20% of your total budget specifically for unexpected costs. Nearly every renovation uncovers at least one unforeseen issue once work begins — water damage behind a wall, outdated wiring that needs updating to meet current code, mold discovered under old flooring, or a structural issue that wasn’t visible during initial planning and inspection.
Older homes, homes with a history of water damage, and any renovation involving opening up walls, floors, or ceilings warrant a contingency closer to 20%, while more contained, cosmetic projects with fewer unknowns can reasonably budget closer to 15%. If you’re working with an unusually tight budget where even 15% feels difficult to set aside, this is a signal to scale back the project’s scope rather than proceed without a safety net, since starting a renovation without any contingency buffer significantly increases the risk of a stalled, half-finished project.
If your project finishes without needing the contingency fund, that’s a good outcome — you can either bank the savings, apply it toward a small additional upgrade you’d been considering, or simply keep it as part of your general home maintenance reserve for future needs. But building your initial budget without this buffer sets up the entire project for financial stress the moment anything unexpected surfaces, which, statistically, is not a matter of if but when for most renovations of meaningful scope.
Also Read: DIY Home Improvement Projects for Beginners
Financing Options Explained
Home equity loans and HELOCs allow you to borrow against equity you’ve built in your home, typically at lower interest rates than unsecured loans, making them a popular choice for larger renovations. A home equity loan provides a lump sum with fixed payments, which works well when you have a clear, finalized budget from the start. A HELOC functions more like a credit line you can draw from as needed throughout the project, which offers more flexibility if your costs are likely to unfold gradually or if you’re not entirely certain of the final scope yet.
Cash-out refinancing replaces your existing mortgage with a new, larger one, giving you the difference in cash for renovation costs. This resets your mortgage terms entirely, so it’s worth comparing the new interest rate and terms carefully against your current mortgage before choosing this route, since a higher rate on your entire mortgage balance can sometimes cost more over time than a smaller, separate loan just for the renovation amount.
Personal loans don’t use your home as collateral and often have faster approval times, though interest rates are typically higher than home equity options. These tend to work well for smaller to mid-size projects where speed matters more than minimizing interest costs, or for homeowners who don’t have significant equity built up yet.
Credit cards with 0% introductory APR can work for smaller projects if you’re confident you can pay off the balance before the promotional period ends, but carry significant risk if the balance isn’t cleared in time, since standard interest rates on unpaid balances are typically high and can quickly offset any initial savings.
Manufacturer or contractor financing is sometimes offered directly for specific projects like HVAC replacement, window installation, or solar panels, and can be worth considering, though it’s important to compare the actual annual percentage rate and terms against other financing options rather than assuming it’s automatically the best deal simply because it’s convenient and offered at the point of sale.
Government-backed renovation loans, such as those designed specifically for home improvement financing, sometimes offer favorable terms for specific project types, particularly energy efficiency upgrades or accessibility modifications. These programs vary significantly by region and eligibility requirements, so it’s worth a quick search into what’s available where you live before ruling them out.
Cost-Saving Strategies Without Sacrificing Quality
Do some of the work yourself. Even if you’re hiring professionals for the technical work, tasks like demolition, painting, cleanup, or landscaping can often be done yourself, reducing labor costs meaningfully without compromising the quality of the specialized work.
Keep the existing layout when possible. Moving plumbing or electrical significantly increases costs, since it involves both the physical labor of relocation and often requires additional permitting and inspection. If a full layout change isn’t essential to solving your actual problem, keeping fixtures in their current locations can save considerably.
Choose mid-range materials strategically. Rather than choosing the cheapest or most expensive option across the board, identify where quality matters most for your specific priorities (durability, high-visibility surfaces, daily-use items) and where a more budget-friendly choice makes sense (surfaces that see less wear or visibility, like the inside of cabinets or a laundry room floor).
Time your project for off-peak seasons. As covered in our main Home Improvement Guide, contractor demand and pricing often drop during off-peak seasons for specific project types, which can meaningfully reduce labor costs, sometimes by a significant margin during a contractor’s slower months.
Buy materials yourself when possible. Some contractors mark up materials they source on your behalf, which is a standard and reasonable business practice but one worth understanding. Ask whether purchasing certain materials yourself, particularly for simpler items like light fixtures or hardware, could reduce overall costs, though be sure to confirm this doesn’t void any warranty or liability protections tied to contractor-sourced materials.
Get multiple quotes and negotiate. As discussed in our main guide, getting at least three quotes gives you leverage to negotiate and a clearer sense of fair market pricing for your specific project and region, and contractors are often willing to adjust pricing or scope slightly when they know they’re being compared against competitors.
Consider a phased approach. If your full renovation vision exceeds your current budget, consider breaking it into phases rather than either overspending now or abandoning parts of the plan entirely. This allows you to complete high-priority elements first while saving for later phases, though it’s worth discussing this approach with your contractor, since some tasks are more efficient to complete together than in separate phases.
Tracking Spending During Your Project
Once your project begins, track spending against your budget categories regularly rather than waiting until the end to see where you stand. A simple spreadsheet tracking planned versus actual costs for each category helps you catch budget overruns early, while there’s still time to adjust remaining decisions rather than discovering a major overage only after the project is complete and options for correction are far more limited.
If you notice early spending trending higher than planned in one category, this is the moment to look for savings elsewhere, rather than hoping later categories will somehow balance out on their own. For example, if your demolition phase reveals unexpected plumbing issues that eat into your contingency fund early, it may be worth revisiting material choices for later phases of the project to keep the overall budget on track.
It’s also worth keeping all invoices, receipts, and change orders organized throughout the project, both for your own tracking purposes and in case any disputes arise with contractors later. A simple folder — physical or digital — dedicated to the project makes this significantly easier than trying to reconstruct spending after the fact.
Sample Budget Breakdown by Project Size
| Project Size | Total Budget Example | Contingency (15–20%) | Typical Allocation Focus |
|---|---|---|---|
| Small (single room refresh) | $2,000–$8,000 | $300–$1,600 | Materials, minimal labor |
| Medium (kitchen or bath, same layout) | $10,000–$25,000 | $1,500–$5,000 | Materials and labor roughly even |
| Large (full remodel, layout changes) | $30,000–$75,000+ | $4,500–$15,000+ | Labor-heavy, permits, plumbing/electrical |
Also Read: Interior and Exterior Painting Guide: Tips for a Professional Finish
Budgeting for Hidden and Often-Forgotten Costs
Beyond the obvious materials and labor, several cost categories are commonly overlooked during initial budgeting. Permit and inspection fees vary by municipality and project type, but they add up, particularly for larger projects requiring multiple inspections at different construction stages. Disposal and dumpster rental fees for demolition debris are another frequently underestimated cost, especially for larger renovations generating significant waste.
Temporary living adjustments deserve their own line item for bigger projects. A kitchen renovation might mean weeks of eating out more or relying on a temporary setup, while a bathroom renovation involving your only full bath might require a hotel stay or arrangements with family or friends. These costs are real and worth planning for rather than treating as an afterthought once the project is already underway.
Finally, consider the cost of temporary storage if your renovation requires moving furniture or belongings out of the workspace for an extended period, and factor in a small buffer for cleaning costs after major renovations, since construction dust and debris often require more intensive cleaning than typical household upkeep.
Common Budgeting Mistakes to Avoid
Skipping the contingency fund. This remains the single most common cause of stalled or financially stressful renovations. Build it into your initial plan, not as an afterthought you’ll deal with if and when something goes wrong.
Basing your budget on inspiration photos alone. Beautiful finished projects on social media and design websites rarely show the true cost breakdown behind them, and comparing your project to a photo without understanding the underlying cost drivers sets unrealistic expectations from the very start.
Forgetting about permit and inspection fees. These costs are easy to overlook in initial planning but add up, particularly for larger projects requiring multiple inspections throughout the process, and skipping them entirely by avoiding permits can create far more expensive problems later.
Not accounting for temporary living adjustments. Larger renovations, especially kitchens and bathrooms, may require temporary solutions that carry their own costs worth factoring into your overall budget from the start, not discovering the need mid-project.
Changing scope mid-project without revisiting the budget. Expanding a project’s scope partway through is sometimes reasonable and even smart if it solves a problem more completely, but it should come with a deliberate budget revision, not just an assumption that the contingency fund will silently absorb the difference.
Choosing financing without comparing true costs. Selecting a financing option based purely on monthly payment size, without considering total interest paid over the loan’s life, can end up costing significantly more than a slightly less convenient option with better overall terms.
Frequently Asked Questions
How much contingency should I build into my home improvement budget?
Most experienced renovators recommend 15–20% of your total project budget, since nearly every renovation uncovers at least one unexpected issue once work begins, particularly in older homes or projects involving opened walls, floors, or ceilings.
What’s the best way to finance a large home improvement project?
It depends on your situation. Home equity loans and HELOCs typically offer the lowest interest rates for larger projects since they use your home as collateral, while personal loans offer faster approval without that requirement, generally at a higher interest rate.
How can I save money on a renovation without sacrificing quality?
Strategies include keeping your existing layout to avoid plumbing and electrical relocation costs, doing some labor yourself (like demolition or painting), timing your project for off-peak contractor seasons, and choosing mid-range materials strategically based on your actual priorities rather than uniformly cheap or expensive choices.
Should I get multiple quotes before starting a project?
Yes, most experts recommend at least three quotes for any project over a few thousand dollars. This gives you a realistic sense of fair market pricing and leverage to negotiate, while also helping you spot bids that seem unusually high or suspiciously low.
What percentage of my budget should go toward materials versus labor?
For a typical mid-range renovation, materials and finishes often account for roughly 40–50% of the budget, labor for 30–40%, and the remainder split between permits, fees, and your contingency fund, though this varies significantly based on project type and whether you’re DIYing any portion of the work.
What costs do people most commonly forget to budget for?
Permit and inspection fees, debris disposal costs, temporary living adjustments during the renovation, and post-construction cleaning are among the most frequently overlooked expenses. Building these into your initial budget, rather than discovering them mid-project, keeps your overall plan more realistic and less stressful.
Is it better to save up for a renovation or finance it?
This depends on your timeline, current savings, and the interest rates available to you. Saving up avoids interest costs entirely but delays the project, while financing allows you to complete the work sooner in exchange for interest costs over time. Many homeowners use a combination — some savings toward the project alongside a financing option for the remainder.
Also Read: Complete Home Decor Guide: Styles, Tips, and Budget-Friendly Ideas for Every Room