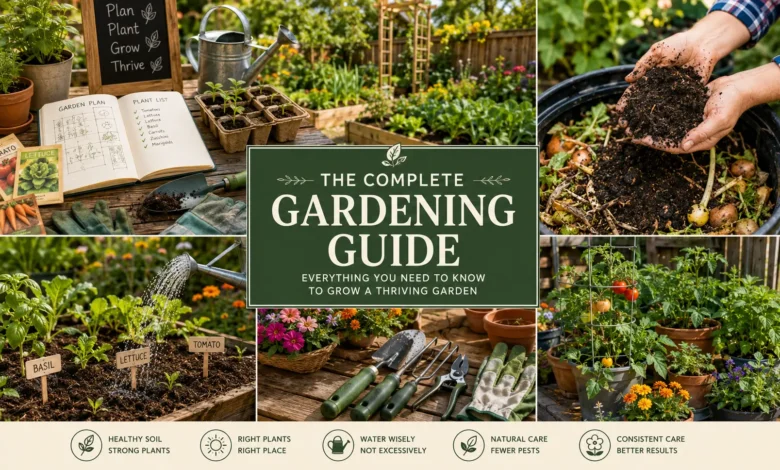
Gardening is one of the most rewarding hobbies you can take up — and also one of the most misunderstood. New gardeners often assume that a green thumb is something you’re born with, when in reality, successful gardening comes down to understanding a handful of core principles: your soil, your climate, your plants’ needs, and consistent care. Whether you’re working with a sprawling backyard, a small urban plot, or a few containers on a balcony, this guide will walk you through everything you need to know to plan, plant, and maintain a garden that thrives season after season.
We’ve built this guide as your central resource for all things gardening. Throughout the article, you’ll find links to more detailed guides on specific topics — from soil testing to pest control — so you can dive deeper into whatever your garden needs most right now.
Why Gardening Is Worth the Effort
Before we get into the how, it’s worth pausing on the why. Gardening isn’t just about growing food or pretty flowers. Research on horticultural therapy has consistently linked regular gardening to lower stress levels, improved mood, and even better cardiovascular health from the physical activity involved. Beyond the wellness benefits, a home garden gives you more control over what you eat, reduces your grocery bill over time, and creates a more sustainable, biodiverse yard that supports pollinators like bees and butterflies.
There’s also a simple satisfaction in watching something you planted with your own hands grow into a tomato you can slice for dinner or a flower bed that transforms your front yard. That payoff is what keeps millions of people gardening year after year, and it’s what we want to help you achieve — even if you’ve never grown so much as a houseplant before.
Step 1: Plan Before You Plant
The single biggest mistake beginner gardeners make is skipping the planning stage. It’s tempting to buy a flat of seedlings on impulse and stick them in the ground, but a little upfront planning saves you time, money, and frustration.
Assess Your Space
Start by walking your yard or balcony at different times of day and taking notes on:
- Sunlight patterns. Which areas get full sun (6+ hours), partial sun (3-6 hours), or shade (less than 3 hours)? Most vegetables and flowering plants need full sun, while leafy greens and shade-tolerant plants can handle less.
- Drainage. After a rainstorm, do you see puddles that take hours to disappear? Poor drainage will drown plant roots and needs to be corrected before planting.
- Existing structures. Note fences, trees, downspouts, and buildings that cast shadows or compete for water and nutrients.
- Available square footage. Even a 4×4-foot raised bed can produce a meaningful amount of food, so don’t let a small yard discourage you.
Set a Realistic Goal
Are you gardening for fresh vegetables, cut flowers, curb appeal, or a mix of everything? Your goal shapes every decision that follows, from plant selection to layout. New gardeners often do best starting small — one raised bed or a few containers — and expanding once they’ve built confidence and routine.
Sketch a Layout
Grab graph paper or a garden-planning app and sketch your space to scale. Group plants with similar water and sunlight needs together, and leave enough spacing between rows for airflow and access. Crowded plants compete for nutrients and are more prone to fungal disease from poor air circulation.
Step 2: Understand Your Growing Zone and Climate
Every successful garden starts with understanding your local growing conditions. In the U.S., the USDA Plant Hardiness Zone Map divides the country into zones based on average annual minimum winter temperatures. Knowing your zone tells you which perennial plants can survive your winters and gives you a general framework for planting windows.
Beyond your hardiness zone, pay attention to:
- Your average last spring frost date and first fall frost date. These dates bookend your growing season and determine when it’s safe to plant frost-sensitive crops like tomatoes and peppers outdoors.
- Microclimates in your yard. A south-facing wall can create a warmer microclimate that lets you push planting dates earlier, while a low-lying area may be a frost pocket that stays cold longer than the rest of your yard.
- Local rainfall patterns. Some regions get consistent rain through the growing season; others rely heavily on irrigation. This affects everything from plant selection to mulching strategy.
Local resources are invaluable here. Your county’s extension office (in the U.S., part of the land-grant university system) offers free, science-based advice tailored to your exact region, along with soil testing services.
Garden Design Principles Worth Knowing
Even a purely functional vegetable garden benefits from a bit of design thinking. A few principles used by experienced gardeners and landscape designers can make your space more productive and more enjoyable to spend time in.
- Group plants by need, not just by type. Rather than organizing purely by “all the tomatoes here, all the flowers there,” group plants that share water and sunlight requirements so you’re not overwatering drought-tolerant plants to keep thirstier neighbors happy.
- Think in layers. In ornamental beds, combining tall background plants, mid-height fillers, and low-growing edging plants creates visual depth and makes efficient use of vertical space. In vegetable gardens, the same idea applies with trellised crops like pole beans or cucumbers grown behind shorter crops like lettuce.
- Leave room to walk without stepping on beds. Defined paths, even simple mulched ones, prevent soil compaction and make it far easier to weed, water, and harvest without damaging plants.
- Repeat elements for cohesion. In ornamental gardens, repeating a color, plant, or material throughout the space creates a sense of intentional design rather than a scattered collection of individual plants.
- Plan for succession. A garden that blooms or produces all at once and then goes quiet for months is less satisfying than one planned for continuous interest — early spring bulbs followed by summer perennials, or spring lettuce followed by summer tomatoes followed by fall greens in the same bed.
A Quick Introduction to Composting
Composting deserves its own mention because it’s arguably the single highest-leverage habit a gardener can build. At its core, composting is simply managed decomposition: combining “green” materials (nitrogen-rich, like kitchen scraps and fresh grass clippings) with “brown” materials (carbon-rich, like dried leaves and cardboard) in roughly equal volumes, keeping the pile moist but not soggy, and turning it periodically to introduce oxygen.
A well-maintained compost pile breaks down into a dark, crumbly, earthy-smelling material in a few months to a year, depending on the method and conditions. Finished compost can be worked into garden beds, used as a top-dressing around existing plants, or mixed into potting soil for containers. Beyond the cost savings on fertilizer and soil amendments, composting diverts a meaningful amount of household waste from landfills, where organic matter breaks down anaerobically and produces methane rather than decomposing productively.
If space is limited, smaller-scale options like a countertop bin combined with a compact tumbler, or vermicomposting with worms, can produce useful compost even in an apartment or small yard setting.
Step 3: Start With the Soil
If there’s one lesson experienced gardeners wish they’d learned sooner, it’s this: healthy plants start with healthy soil, not the other way around. Many beginner gardening problems — stunted growth, yellowing leaves, poor yields — trace back to soil issues rather than the plants themselves.
Know Your Soil Type
Garden soil generally falls into a few broad categories:
- Clay soil holds water and nutrients well but drains slowly and can compact easily, suffocating roots.
- Sandy soil drains quickly and warms up fast in spring but struggles to retain water and nutrients.
- Silty soil is fertile and holds moisture reasonably well but can compact.
- Loam is the gold standard — a balanced mix of sand, silt, and clay that drains well while retaining moisture and nutrients.
A simple jar test can help you estimate your soil composition: fill a clear jar about a third full with soil, add water, shake it vigorously, and let it settle overnight. The layers that separate out (sand on the bottom, silt in the middle, clay on top) give you a rough idea of your soil’s makeup.
Test Your Soil’s pH and Nutrients
Most vegetables and ornamentals prefer a slightly acidic to neutral pH, roughly 6.0 to 7.0. Soil that’s too acidic or too alkaline locks up nutrients even when they’re technically present in the ground, leaving plants unable to absorb what they need. A basic home soil test kit or a lab test through your local extension office will tell you your pH along with nitrogen, phosphorus, and potassium levels, and most tests come with recommendations for correcting deficiencies.
Build Soil Health Over Time
Rather than relying solely on synthetic fertilizers, focus on building organic matter, which improves soil structure regardless of your starting soil type:
- Compost is the single best amendment you can add. It improves drainage in clay soil and water retention in sandy soil, while feeding the beneficial microbes that make nutrients available to plant roots.
- Cover crops, like clover or winter rye, protect and enrich soil during the off-season if you have the space to let a bed rest.
- Avoid walking on garden beds, which compacts soil and undoes structural improvements. Raised beds or defined pathways help protect soil structure over the long term.
We cover soil testing and amendment strategies in much more depth in our dedicated guide, How to Test and Improve Your Garden Soil, which is worth reading before your first planting season if soil health is new territory for you.
Step 4: Choose the Right Plants
With your space, climate, and soil understood, it’s time for the fun part: choosing what to grow. A few principles will save you disappointment.
Match Plants to Your Conditions, Not the Other Way Around
It’s far easier to choose plants suited to your sunlight, soil, and climate than to try to force a plant to thrive somewhere it fundamentally doesn’t want to be. A sun-loving tomato in a shady corner will always underperform, no matter how much fertilizer you add.
Start With Easy, Forgiving Plants
If you’re new to gardening, build confidence with plants that are genuinely hard to fail with:
- Vegetables: zucchini, green beans, radishes, lettuce, and cherry tomatoes are all beginner-friendly and fast to reward you with a harvest.
- Herbs: mint, basil, chives, and rosemary tolerate a range of conditions and are useful in the kitchen right away.
- Flowers: marigolds, zinnias, and sunflowers are nearly foolproof and add color quickly while also attracting pollinators to your vegetable beds.
If vegetables are your main focus, our guide to Vegetable Gardening for Beginners walks through exactly what to plant and when, crop by crop.
Consider Native and Regionally Adapted Plants
Native plants are adapted to your local rainfall, soil, and pest pressure, which typically means less watering, less fertilizing, and fewer pest problems once established. They also support local pollinators and wildlife far more effectively than many ornamental imports. A quick search for “native plants” plus your state name, or a visit to a local native plant nursery, is a great starting point.
Read the Plant Tag or Seed Packet
It sounds basic, but plant tags and seed packets contain everything you need to know: mature size, sun requirements, spacing, days to maturity, and planting depth. Skipping this information is one of the most common reasons beginner gardens underperform.
Step 5: Master Planting Technique
How you get a plant into the ground has a real effect on how well it establishes.
Starting From Seed vs. Buying Transplants
Starting from seed is more economical and gives you access to far more variety than what’s available at a garden center, but it requires more time, indoor space (for seeds started before your last frost), and patience. Buying transplants is faster and more forgiving for beginners, especially for slow-growing or finicky crops like tomatoes and peppers.
Some plants, like carrots, beans, and root vegetables generally, don’t transplant well and should be direct-sown into the garden rather than started indoors.
Planting Depth and Spacing
A common rule of thumb for seeds is to plant at a depth roughly two to three times the seed’s diameter, though this varies by plant, so always check the seed packet. Spacing matters just as much: crowded plants compete for light, water, and nutrients, and poor airflow between them increases the risk of fungal disease.
Hardening Off Transplants
If you started seeds indoors or bought transplants that were greenhouse-grown, don’t move them straight into the garden. Harden them off over 7-10 days by gradually increasing their outdoor exposure — starting with an hour or two in a sheltered, shaded spot and building up to a full day outdoors before transplanting. Skipping this step often shocks tender seedlings, causing wilting or stunted growth.
Watering In After Planting
Always water thoroughly immediately after planting or transplanting, even if rain is in the forecast. This settles soil around the roots and eliminates air pockets that can dry out delicate root systems.
Step 6: Water Wisely
Overwatering and underwatering are both common, and both cause similar-looking symptoms (wilting, yellowing leaves), which confuses a lot of beginners.
General Watering Principles
- Water deeply and less frequently rather than shallowly and often. Deep watering encourages roots to grow downward in search of moisture, creating a more drought-resilient plant. Frequent shallow watering keeps roots near the surface, where they’re more vulnerable to heat and drought stress.
- Water at the base of the plant, not overhead, when possible. Wetting foliage, especially in the evening, creates conditions that encourage fungal diseases like powdery mildew and blight.
- Water in the early morning. This gives plants time to absorb moisture before the heat of the day and allows any leaves that do get wet to dry before evening.
- Check soil moisture before watering by sticking a finger about two inches into the soil. If it’s dry at that depth, it’s time to water; if it’s still moist, hold off.
Adjust for Plant Type and Weather
Container plants dry out faster than in-ground plants and typically need more frequent watering, sometimes daily in hot weather. Established perennials and trees generally need less frequent watering than annual vegetables and flowers, which have shallower root systems. Always adjust your watering schedule for rainfall and heat waves rather than sticking rigidly to a fixed routine.
Step 7: Feed Your Plants
Plants need three primary macronutrients — nitrogen (N), phosphorus (P), and potassium (K) — along with a range of micronutrients, to grow well. These are the numbers you see on fertilizer packaging (like 10-10-10).
- Nitrogen fuels leafy, green growth and is especially important for leafy vegetables and lawns.
- Phosphorus supports root development, flowering, and fruiting.
- Potassium supports overall plant health, disease resistance, and stress tolerance.
Organic vs. Synthetic Fertilizer
Organic fertilizers, like compost, aged manure, and fish emulsion, release nutrients slowly as they break down, feeding soil biology along the way and improving soil structure over time. Synthetic fertilizers act faster but don’t improve soil structure and can lead to nutrient runoff if overapplied. Many experienced gardeners use a combination: building long-term soil health with compost while using targeted synthetic or organic fertilizers to correct specific deficiencies identified through soil testing.
Don’t Over-Fertilize
More fertilizer isn’t better. Over-fertilizing, especially with nitrogen, can cause lush foliage at the expense of flowers and fruit, burn plant roots, and contribute to nutrient runoff that harms local waterways. Always follow package instructions and base your fertilizing decisions on a soil test where possible.
Step 8: Mulch Everything
If soil is the foundation of a good garden, mulch is the single most underrated tool for maintaining it. A 2-3 inch layer of mulch around your plants:
- Suppresses weeds by blocking light to weed seeds
- Retains soil moisture, reducing how often you need to water
- Regulates soil temperature, keeping roots cooler in summer and insulated in winter
- Breaks down over time (if organic) to add nutrients and improve soil structure
Organic mulch options include shredded bark, straw, shredded leaves, and grass clippings. Keep mulch a couple of inches away from plant stems and tree trunks to prevent rot and pest issues.
Step 9: Manage Pests and Disease Naturally
Every garden will deal with pests and disease at some point — the goal isn’t a completely pest-free garden, but a resilient one that can handle some pressure without major damage.
Prevention First
The most effective pest and disease management is preventive:
- Choose disease-resistant plant varieties where available, especially for crops prone to common issues like tomato blight.
- Rotate crops each season, especially within the same plant families (like tomatoes, peppers, and eggplant, all nightshades), to prevent soil-borne diseases and pests from building up.
- Encourage beneficial insects like ladybugs, lacewings, and parasitic wasps by planting flowers such as dill, yarrow, and alyssum near your vegetables. These beneficial insects prey on common pests like aphids.
- Inspect plants regularly so you catch problems early, when they’re far easier to manage.
When Problems Arise
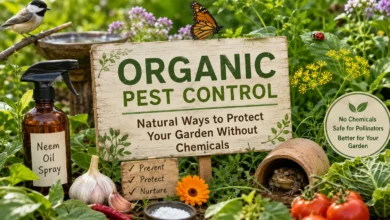
Identify the specific pest or disease before treating it — a solution for aphids won’t help with fungal blight, and vice versa. Many county extension offices offer free plant diagnostic services if you’re unsure what you’re dealing with. Start with the least invasive option, like hand-picking pests or spraying them off with water, before moving to insecticidal soap, neem oil, or other organic treatments, reserving synthetic pesticides as a last resort.
We go into much more detail on organic, family- and pet-safe pest management strategies in our dedicated guide, Organic Pest Control: Natural Ways to Protect Your Garden.
Step 10: Prune and Maintain Through the Season
Ongoing maintenance keeps your garden productive and healthy throughout the growing season.
- Deadhead spent flowers on annuals and many perennials to encourage continued blooming.
- Pinch back leggy seedlings and herbs to encourage bushier, fuller growth rather than tall, sparse plants.
- Stake or cage tall or vining plants, like tomatoes and peas, early in the season before they need it, since staking after a plant has sprawled can damage roots and stems.
- Weed consistently. Weeds compete directly with your plants for water, nutrients, and light, and pulling them while small is far easier than dealing with an established weed problem later.
- Remove diseased or dead plant material promptly to prevent disease from spreading to healthy plants nearby.
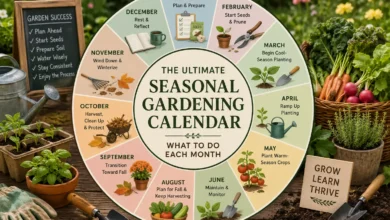
Step 11: Follow a Seasonal Rhythm
Gardening is inherently cyclical, and understanding the seasonal rhythm of your climate helps you plan ahead rather than reacting in the moment.
- Early spring is for soil preparation, cool-season crops like peas and lettuce, and starting warm-season seeds indoors.
- Late spring, after your last frost date, is for transplanting warm-season crops like tomatoes, peppers, and squash.
- Summer is largely maintenance: watering, weeding, pest monitoring, and harvesting, along with succession planting of fast-growing crops.
- Fall is for harvesting the last of your warm-season crops, planting cool-season crops for a fall harvest, and starting garden cleanup.
- Winter, in colder climates, is for planning next year’s garden, ordering seeds, and maintaining tools, while gardeners in mild climates may be able to grow cool-season crops through the winter months.
We break this down month-by-month in far more detail in our Seasonal Gardening Calendar, which is a useful reference to keep handy throughout the year.
Step 12: Build Your Toolkit
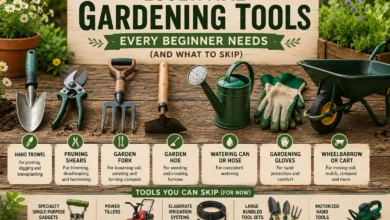
You don’t need an elaborate collection of tools to start gardening, but a few well-chosen ones make the work significantly easier:
- A sturdy hand trowel for planting and transplanting
- A garden fork for loosening and aerating soil
- Pruning shears for deadheading, harvesting, and light pruning
- A hoe for weeding and cultivating soil
- A watering can or hose with an adjustable nozzle
- Gardening gloves to protect your hands
- A wheelbarrow or garden cart for moving soil, mulch, and plants, especially useful as your garden grows
Investing in a few quality tools upfront, rather than a large set of cheap ones, typically pays off in durability and how much easier they make the work. For a complete breakdown of what to buy first and what you can skip, see Essential Gardening Tools Every Beginner Needs.
Container and Small-Space Gardening
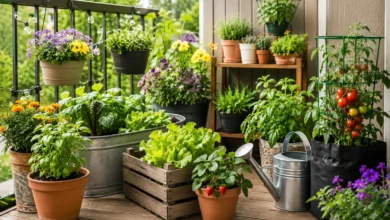
Not everyone has a yard, and that’s not a barrier to gardening. Containers, raised beds, and vertical structures let you grow a genuinely productive garden on a balcony, patio, or small urban lot.
Key considerations for container gardening include choosing pots with drainage holes, using a quality potting mix (not garden soil, which compacts and drains poorly in containers), and watering more frequently since containers dry out faster than in-ground beds. Vertical trellises, hanging baskets, and tiered planters can multiply your growing space significantly without requiring more square footage. Our full guide, Container Gardening: How to Grow a Thriving Garden in Small Spaces, covers pot sizing, soil mixes, and the best plants for balconies and patios in more detail.
Gardening Sustainably
More gardeners are thinking beyond just what they grow to how they grow it. Sustainable gardening practices — composting kitchen scraps, collecting rainwater, choosing native and drought-tolerant plants, minimizing synthetic chemical use, and building healthy soil biology — reduce your garden’s environmental footprint while often making it more resilient and lower-maintenance in the long run. A garden that works with its local ecosystem, rather than against it, tends to need less water, less intervention, and less ongoing cost.
Also Read: 25 Mini Garden Ideas for Small Homes
Common Beginner Mistakes to Avoid
A quick rundown of the mistakes that trip up most new gardeners, so you can sidestep them from the start:
- Planting too much, too soon. Start smaller than you think you need to — you can always expand next season.
- Ignoring soil health in favor of focusing only on fertilizer and watering.
- Overcrowding plants, which leads to competition for resources and increased disease risk.
- Overwatering, which is a more common killer of plants than underwatering.
- Planting before the last frost date out of impatience, only to lose tender seedlings to a late cold snap.
- Skipping soil testing and guessing at fertilizer needs, which often leads to over- or under-fertilizing.
- Not matching plants to available sunlight, leading to leggy, underperforming plants in too much shade or scorched plants in too much sun.
Frequently Asked Questions
How much does it cost to start a garden?
A basic garden can be started for relatively little — a few packets of seeds, basic hand tools, and compost. Costs rise if you invest in raised beds, irrigation systems, or larger transplants, but a productive vegetable garden doesn’t require a large budget.
How long does it take to see results?
Fast-growing crops like radishes and lettuce can be ready to harvest in as little as three to six weeks. Slower crops like tomatoes and peppers typically take two to three months from transplanting to first harvest.
Do I need a large yard to grow my own food?
No. A single raised bed, a few large containers, or even a well-planned windowsill herb garden can produce meaningfully. Productivity depends more on plant selection, spacing, and care than on total square footage.
How often should I water my garden?
This depends on your soil, climate, and plant type, but a general guideline is one to two inches of water per week for most vegetable gardens, adjusted for rainfall and container versus in-ground planting.
What’s the easiest plant for a total beginner to grow?
Herbs like mint and chives, and vegetables like zucchini, radishes, and green beans, are generally considered among the most forgiving choices for first-time gardeners.
Is it better to garden in raised beds or directly in the ground?
Both approaches work well, and the right choice depends on your existing soil quality and budget. Raised beds give you full control over soil composition from day one, warm up faster in spring, and are easier on the back and knees, but they cost more upfront and dry out faster than in-ground beds. In-ground gardening is less expensive to start and retains moisture longer, but takes more time to improve if your native soil is poor.
How do I know if my garden is getting too much or too little water?
Wilting can indicate either problem, which is why checking the soil directly is more reliable than watching the leaves alone. Consistently soggy soil, yellowing lower leaves, and a musty smell point to overwatering, while dry, crumbly soil and crispy leaf edges point to underwatering. Checking soil moisture a couple of inches below the surface before every watering session is the most reliable way to stay on track.
Final Thoughts
Gardening rewards patience and consistency far more than it rewards perfection. Every experienced gardener has killed plants, dealt with pest outbreaks, and misjudged a planting date at some point — it’s part of the learning process, not a sign you’re doing it wrong. Start with the fundamentals covered in this guide: understand your space and soil, choose plants suited to your conditions, water and feed thoughtfully, and stay consistent with maintenance.
As you get more comfortable with the basics, explore our in-depth guides linked throughout this article to go deeper on soil health, vegetable growing, container gardening, pest management, seasonal planning, and tools. Each one builds on the foundation you’ve just read, so you can grow your skills alongside your garden.
Also Read: Renter-Safe Decorating Tips: The Complete 2026 Guide